


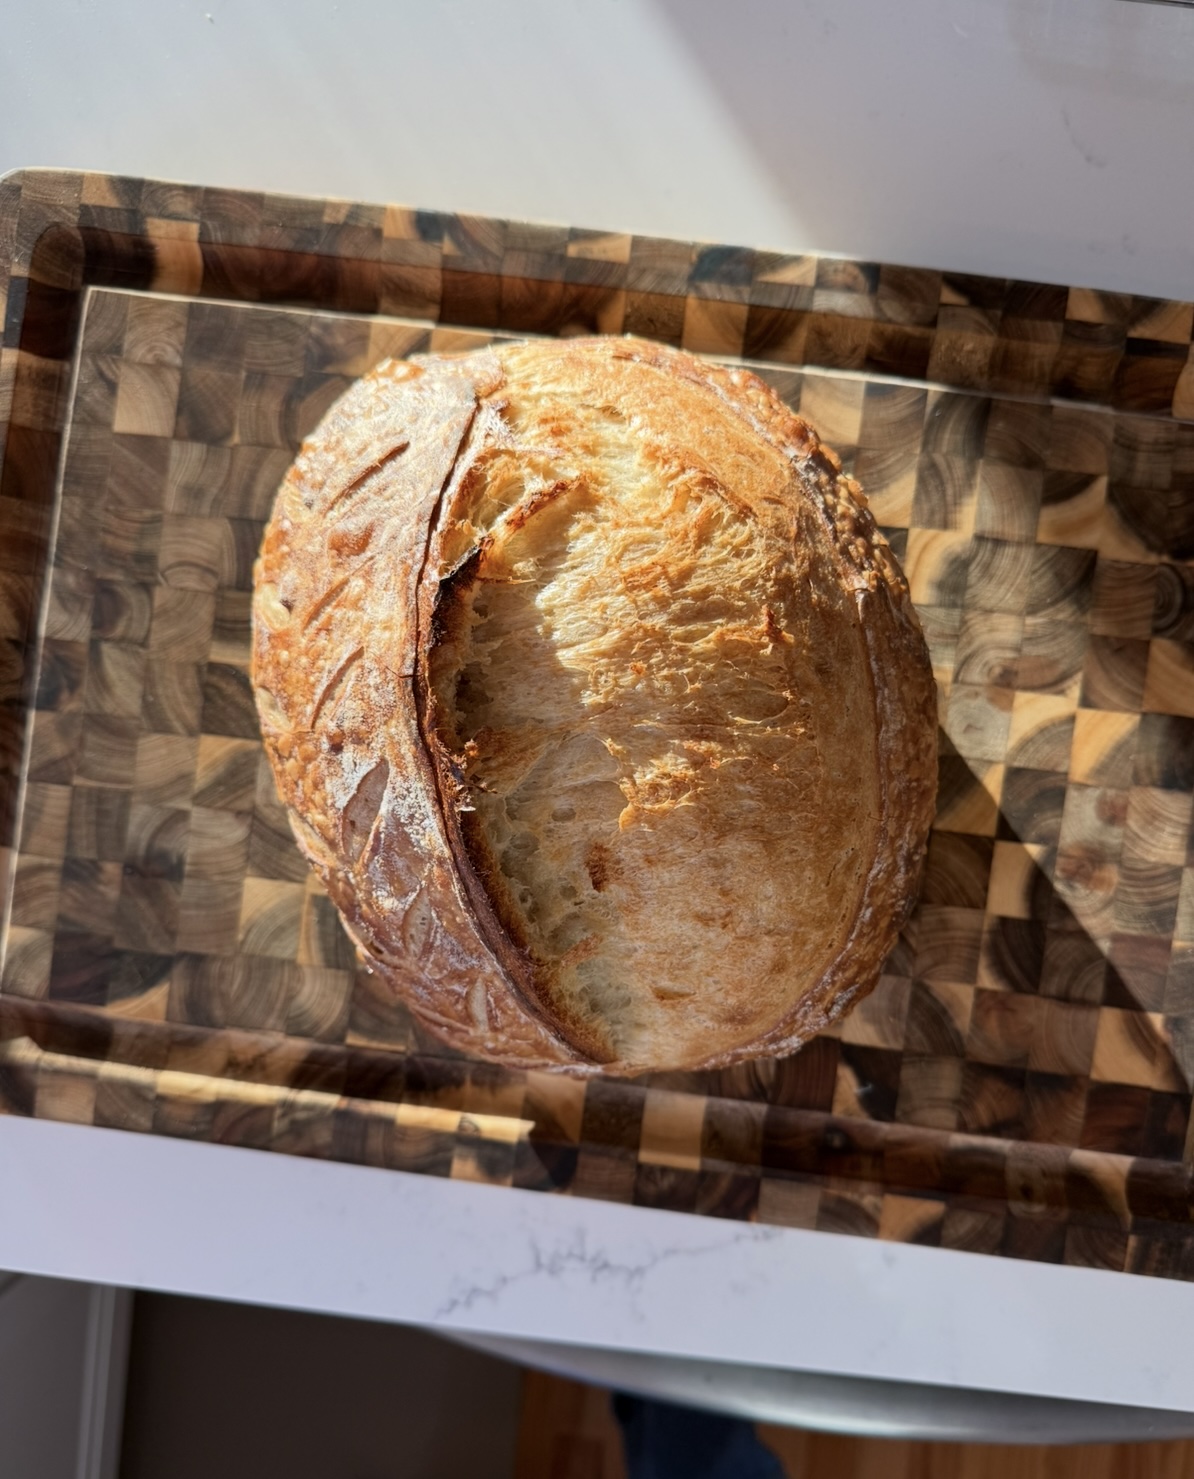
If sourdough has ever felt intimidating or unpredictable, this loaf is for you! This is a straightforward, beginner-friendly sourdough recipe that focuses on reading the dough instead of chasing the clock and it delivers a beautiful rise with a crisp, crackly crust and soft interior.
No mid-process starter additions, no complicated steps, just solid technique and a few key cues that make all the difference.
Why This Recipe Works
- Moderate hydration for easier handling
- Stretch-and-folds instead of kneading
- Cold proofing for flavor and control
- High-heat bake with steam for oven spring
- A hot, dry finish for a better crust
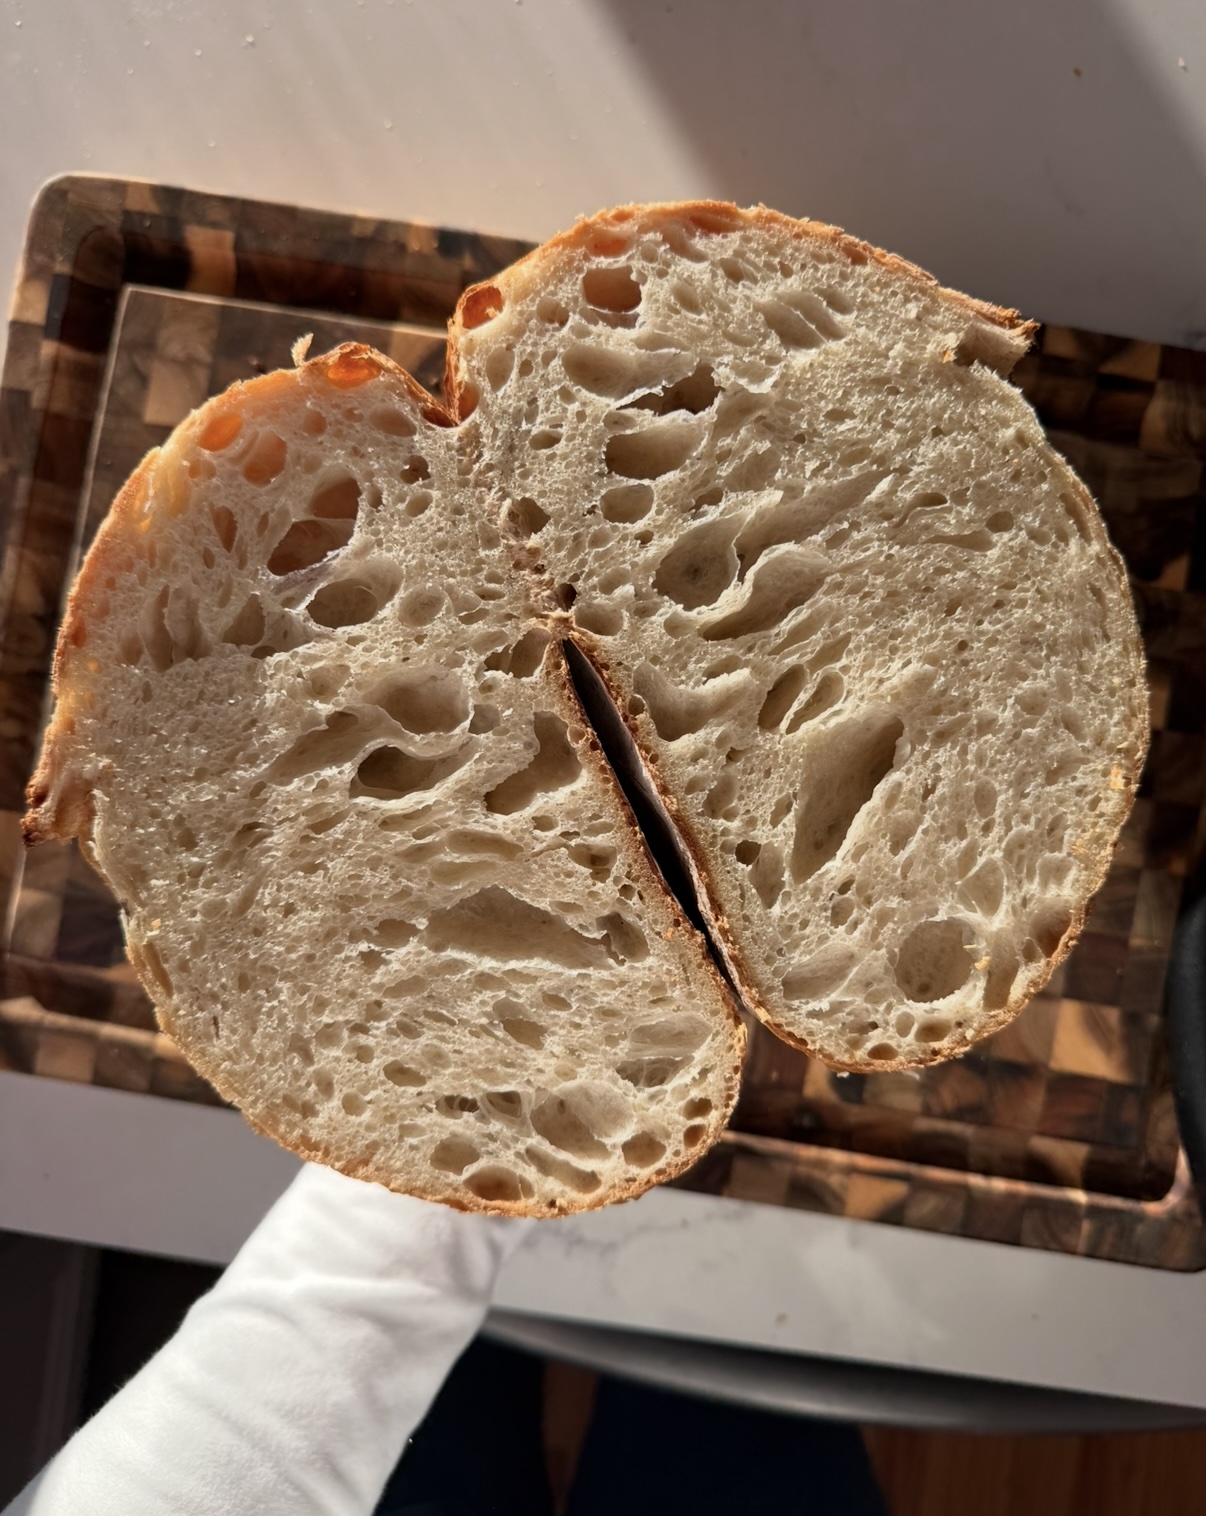
If you’ve ever had sourdough that tasted great but felt a little gummy or had a thin crust, the bake method here is the fix.
Tips for a Better Crust & Crumb
- Bake darker than you think (pale loaves tend to be underbaked inside)
- Don’t rush bulk fermentation; stop before doubling
- A slightly underproofed loaf will spring better than an overproofed one
- Always preheat your oven and Dutch oven fully

Perfect Sourdough Every Time (beginner-friendly)
Ingredients
- 100 g active sourdough starter (bubbly and recently fed)
- 325–350 g warm water (start lower if new to sourdough)
- 500 g all-purpose flour
- 10 g salt
Instructions
Step 1: Mix the Dough In a large bowl, whisk together the starter and water until milky. Add the flour and salt and mix until no dry flour remains. The dough will look shaggy, that’s normal.
Cover and let rest for 30 minutes. This rest allows the flour to fully hydrate and makes the dough easier to work with.
Step 2: Stretch & Folds Over the next 2 hours, perform 3–4 sets of stretch and folds (you can also do slap and folds or coil foids), spaced about 30 minutes apart.
To stretch and fold: Grab one side of the dough, stretch it upward, and fold it over itself. Rotate the bowl and repeat until all four sides are folded
With each set, the dough should become smoother, stronger, and more elastic.
Step 3: Bulk Fermentation (Watch the Dough, Not the Clock) After the final fold, let the dough rest at room temperature until it has risen about 50–75% — not doubled.
Signs bulk fermentation is complete:
•Dough looks puffy and slightly domed
•Small bubbles appear on the surface or along the sides
•Dough jiggles slightly when the bowl is shaken
•A gentle floured finger press springs back slowly, leaving a small dent
This usually takes 3–5 hours, depending on room temperature and starter strength.
Step 4: Pre-Shape
Turn the dough out onto a lightly floured surface. Gently shape it into a loose round using a bench scraper. Let it rest, uncovered, for 20–30 minutes. This relaxes the gluten and helps prevent tearing during final shaping.
Step 5: Final Shape
Shape the dough into a tight round or oval, creating surface tension without tearing the dough (I like to start with an envelope fold then glide the dough on the counter seam down to create more tension). Place seam-side up into a well-floured banneton or towel-lined bowl.
Cold Proof Cover and refrigerate for 12–24 hours.
Cold proofing:
•Improves flavor
•Makes scoring easier
•Helps prevent overproofing
•Leads to better oven spring
Step 6: Bake (For the Best Crust and Rise)
Preheat (This Matters!)
Place a Dutch oven with the lid on into your oven and preheat at 500°F for 45–60 minutes. A fully heated Dutch oven is essential for oven spring and crust development.
Bake with Steam
1.Remove dough from the fridge, carefully transfer the loaf to parchment and score immediately.
2. Optional but helpful: add 1–2 ice cubes under the parchment paper once the loaf is inside the Dutch oven for extra steam.
3. Cover and bake at 500°F for 20 minutes.
Step 7: Finish the Bake
Remove the lid, reduce oven temperature to 450°F, and bake 15–20 minutes, until the loaf is deeply golden and sounds hollow when tapped.
For an extra crispy crust:
•Turn off the oven
•Crack the oven door
•Leave the loaf inside for 5 minutes to dry out the crust
Step 8: Cooling (Don’t Skip This)
Let the bread cool on a wire rack for at least 90 minutes before slicing. Cutting too early can result in a gummy crumb, even if the bread is fully baked. Enjoy!


